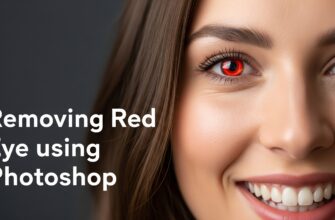
Removing red-eye and flash reflections from subjects’ eyes in Adobe Photoshop is essential for producing natural and professional-looking photographs. This comprehensive guide will walk you through effective methods to correct these issues, enhancing the overall quality of your images.
Understanding Red-Eye and Flash Reflections
- Red-Eye Effect: Occurs when a camera flash reflects off the retina at the back of the eye, resulting in a red appearance in the pupils.
- Flash Reflections: Manifest as bright spots or glare in the eyes, often due to direct flash or reflective surfaces.
Removing Red-Eye Using Photoshop’s Red Eye Tool
Photoshop offers a dedicated Red Eye Tool designed to quickly and effectively eliminate red-eye from photos.
Steps:
- Open Your Image: Launch Photoshop and load the image requiring correction.
- Select the Red Eye Tool:
- In the toolbar, locate the Spot Healing Brush Tool.
- Click and hold to reveal additional options, then select the Red Eye Tool.
- Adjust Tool Settings (Optional):
- Pupil Size: Adjust to match the size of the red area.
- Darken Amount: Set the darkness level for the corrected area.
- Apply the Tool:
- Click directly on the red portion of each eye.
- Photoshop will automatically replace the red color with a natural dark tone.
For a visual demonstration, refer to this tutorial:
Removing Flash Reflections Using the Clone Stamp Tool
The Clone Stamp Tool allows for precise removal of flash reflections by sampling and painting over the affected area.
Steps:
- Create a New Layer:
- In the Layers panel, click the New Layer icon to work non-destructively.
- Select the Clone Stamp Tool:
- Press
Son your keyboard or select it from the toolbar.
- Press
- Configure Tool Settings:
- Choose a soft-edged brush to blend corrections seamlessly.
- Set the Sample option to Current & Below to sample from all visible layers.
- Sample an Area:
- Hold the
Altkey (Windows) orOptionkey (Mac) and click on an area adjacent to the reflection that closely matches the natural eye texture.
- Hold the
- Paint Over the Reflection:
- Carefully paint over the reflection, using multiple samples if necessary to maintain natural variation.
For additional guidance, consider this resource: How to Remove Flash Glare in Photoshop – Envira Gallery
Enhancing Eye Realism After Corrections
Post-correction, it’s crucial to restore natural highlights to maintain the eyes’ lifelike appearance.
Steps:
- Create a New Layer:
- Click the New Layer icon in the Layers panel.
- Select the Brush Tool:
- Press
Bon your keyboard or select it from the toolbar.
- Press
- Configure Brush Settings:
- Choose a small, soft-edged brush.
- Set the foreground color to white.
- Add Catchlights:
- Gently click to add a small highlight in each eye, mimicking natural light reflection.
- Adjust Opacity:
- Reduce the layer’s opacity if the highlight appears too intense.
For a detailed walkthrough, watch this tutorial:
Tips for Effective Eye Corrections
- Non-Destructive Editing: Always work on a new layer to preserve the original image.
- Zoom In: Magnify the eye area to make precise adjustments.
- Subtlety is Key: Avoid over-editing; maintain the natural texture and appearance of the eyes.
By mastering these techniques, you can effectively remove red-eye and flash reflections, ensuring your subjects’ eyes appear clear and natural in your photographs.
![5 Proven Ways to Fix Flash in Eyes: A Personal Story and Practical Solutions [Ultimate Guide for Eye Health]](https://essential-photoshop-elements.com/wp-content/uploads/2023/04/tamlier_unsplash_5-Proven-Ways-to-Fix-Flash-in-Eyes-3A-A-Personal-Story-and-Practical-Solutions--5BUltimate-Guide-for-Eye-Health-5D_1681108416.webp)

![Mastering the Art of Design: How Curved Lines Can Transform Your Creations [Expert Tips and Stats]](https://essential-photoshop-elements.com/wp-content/uploads/2023/04/tamlier_unsplash_Mastering-the-Art-of-Design-3A-How-Curved-Lines-Can-Transform-Your-Creations--5BExpert-Tips-and-Stats-5D_1681309695-335x220.webp)
![Softening Photo Edges: A Step-by-Step Guide to Achieving a Professional Look [With Statistics and Examples]](https://essential-photoshop-elements.com/wp-content/uploads/2023/04/tamlier_unsplash_Softening-Photo-Edges-3A-A-Step-by-Step-Guide-to-Achieving-a-Professional-Look--5BWith-Statistics-and-Examples-5D_1681648321-335x220.webp)


![Mastering Photoshop: The Ultimate Guide to Shortcut Tricks for Changing Brush Size [With Real-Life Examples and Stats]](https://essential-photoshop-elements.com/wp-content/uploads/2023/04/tamlier_unsplash_Mastering-Photoshop-3A-The-Ultimate-Guide-to-Shortcut-Tricks-for-Changing-Brush-Size--5BWith-Real-Life-Examples-and-Stats-5D_1680737268-335x220.webp)
![10 Tips for a Smooth Photoshop Experience: A Designer’s Journey [Expert Advice + Stats]](https://essential-photoshop-elements.com/wp-content/uploads/2023/04/tamlier_unsplash_10-Tips-for-a-Smooth-Photoshop-Experience-3A-A-Designer-26-238217-3Bs-Journey--5BExpert-Advice--2B-Stats-5D_1682299603-335x220.webp)
![Mastering Text Manipulation in Photoshop: A Step-by-Step Guide on How to Bend Text [with Statistics and Examples]](https://essential-photoshop-elements.com/wp-content/uploads/2023/04/tamlier_unsplash_Mastering-Text-Manipulation-in-Photoshop-3A-A-Step-by-Step-Guide-on-How-to-Bend-Text--5Bwith-Statistics-and-Examples-5D_1682353686-335x220.webp)